Note: This guide is a walkthrough for players who wish to continue their progression beyond basic skills. It is not to be used for speedrunning on new slots and is a basic way of describing the game to intermediate level players (level 10-30). The previous guide can be found here: Beginner Guide.
According to most players, the early-game ends either when you join a faction or enter Great Crossroads.
Starting Intermediate Progression[]
Now that you are level 10 from grinding in Mushroom Grotto, it is now time to move on. From Nilgarf, go to the Nilgarf Banks and look for a teleporter found to the left of the Bankteller offices. Walk through that teleporter to travel to the next location.
Great Crossroads[]
Welcome to the Great Crossroads! As its name suggests, this location is known for its forked paths, each leading to separate connecting locations. This area is also the center of the world, as the game description states.
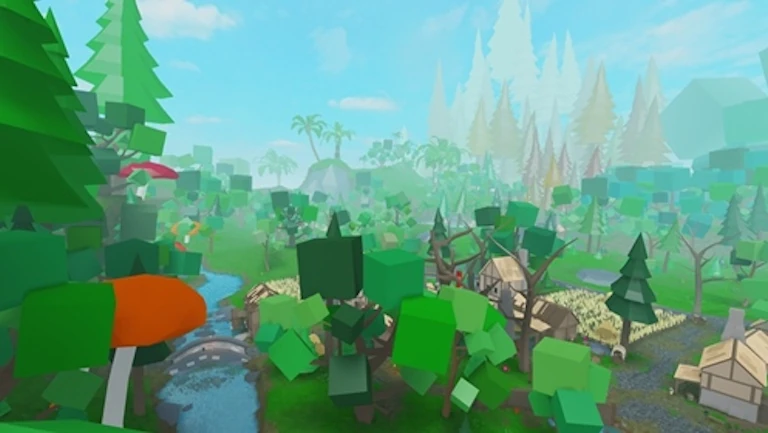
Explore around the Great Crossroads for chests and new mobs. It seems like there are farm fields up ahead; what’s that all about?
Enemies[]
Scarecrow[]
- Found hung on crosses in the farm fields.
- Higher Damage and speed compared to the Hog. Very dangerous when in its aggro state. Resistant when de-aggroed.
- Looks like a real-life Scarecrow made out of hay.
- Avoid at all costs until LVL 15.
Yikes! The farm fields aren't safe as scarecrows are a large threat! However, they cannot jump over certain objects, such as stone walls or high fences. If you wish to kill one at your current level, you may need to lure it to a wall/fence to damage it safely. Successfully killing one may reward a lot of XP along with potential drops. The backstory of the scarecrows can be known by interacting with a nearby farmer NPC.
Statues of Fate[]

While in Great Crossroads, walk straight following the stone path from the Mushtown entrance. You will eventually run into the Statues of Fate, which should be easily discernible. Behind each statue are hanging banners consisting of icons of their respective factions. These statues represent the 3 main factions in Vesteria (also referred to as “classes”), and inspecting them reveals additional information of their base's whereabouts. Players who are at least level 10 will be able to join a faction. Factions are important as they will ultimately affect your play style for the rest of the game.
Classes[]
There are 3 classes: the ![]() Hunters,
Hunters,![]() Warriors, and
Warriors, and ![]() Mages. These are covered more in-depth on their respective pages. Below, we also listed the subclasses that branch from each faction, however, for now don't worry about it since a player must be level 30 to acquire a subclass.
Mages. These are covered more in-depth on their respective pages. Below, we also listed the subclasses that branch from each faction, however, for now don't worry about it since a player must be level 30 to acquire a subclass.
Note: It is common for players to ask which class deals the most damage. However, which class you choose doesn’t ultimately determine your damaging capabilities as Hunter is better for single-target, and Mage is better for multi-target. Other factors that may affect your damage include your stats and skills.
Hunter[]
The Hunter class is known for its agile and stealthy nature. Hunters rely on fast attacks and movement while also being capable of dealing ranged attacks. Hunters primarily use Daggers and Bows. The Dexterity stat is the most useful for the Hunter class, although most Hunter class users will have points into Strength. Its subclasses are the ![]() Ranger,
Ranger, ![]() Trickster, and
Trickster, and ![]() Assassin.
Assassin.
Warrior[]
The Warrior class is known for striking heavy blows and dealing massive damage. Warriors rely on strength and a good constitution to perform at its greatest potential. Warriors primarily use Swords. The Strength stat is most useful for the Warrior class. Users of the Warrior class may prefer to have a few points into Vitality and/or Dexterity. Its subclasses are ![]() Paladin,
Paladin, ![]() Knight, and
Knight, and ![]() Berserker.
Berserker.
Mage[]
The Mage class is known for its magical attacks and massive ranged and area damage capabilities. Mages rely on channeling magic through certain weapons to cast spells that deal great damage from afar. Mages primarily use Staves and Tomes. The Intelligence stat is the most useful stat for Mage class users rather than Strength, Vitality, or Dexterity. Its subclasses are the ![]() Cleric,
Cleric, ![]() Sorcerer, and
Sorcerer, and ![]() Warlock.
Warlock.
Choosing Classes[]
When you have decided which faction you want to join, you must go to their respective faction base to actually receive that class. This will be covered in some of the following portions of the guide.
Nilgarf Entrance[]
In the Great Crossroads, you may notice a gate that leads to a prosperous town, however, Brutus the City Guard keeps kicking you away. This city must be Nilgarf! However, Brutus only allows level 7+ players to get in, so you might need to come back stronger.
Innkeeper’s Son[]
Remember that quest from Innkeeper Edith you received in Mushtown? She told you that her son works in the Great Crossroads which happens to be where you are! Explore around until you find her son who happens to be a Barber working inside one of the buildings that is accessible through the door. Once you find him, you should be able to complete the quest. The barber also allows you to change your appearance with the cost of 50 ![]() and has a shop where you can purchase dyes to change the shade of color of a certain equipment.
and has a shop where you can purchase dyes to change the shade of color of a certain equipment.
Pathway to Classes[]
After touring around, it is time to move on. Head past the farm fields to another sublocation with windmills known as the Crossroads Inn.
Business Trip[]
Turn left into an enclosed area around the campfire. You should notice a miniature familiar figure sitting on the cart. He is Albert Figgleglasses, the person you rode the cart with in A New Adventure! Once you talk to him, the Business Trip quest will initiate. Hold on to this quest as it may come in hand later.
Continue past the Crossroads inn, and a real crossroads will meet you! What path should you take from here?
Note: This portion of the guide will differ depending on what class you choose.
Becoming an Intermediate[]
This is where classes play a role! You are currently an Adventurer. Depending on which class you chose, you may venture through different terrains. Each tab represents the path for 1 specific class. Note: do not move on to the “Continuing Intermediate Progression” section until you’ve chosen a class. An exception is if you want to try an Adventurer-only run, which is not advised for first-slots.
You have decided to become a ![]() Hunter! The agile and stealthy type of class. The path you seek lies to your left. If you have done everything correctly, the left path should resemble a beach-like terrain with starfish and seashells embedded within the sandy floor. Continue on this path until you reach the end.
Hunter! The agile and stealthy type of class. The path you seek lies to your left. If you have done everything correctly, the left path should resemble a beach-like terrain with starfish and seashells embedded within the sandy floor. Continue on this path until you reach the end.
Seaside Path[]
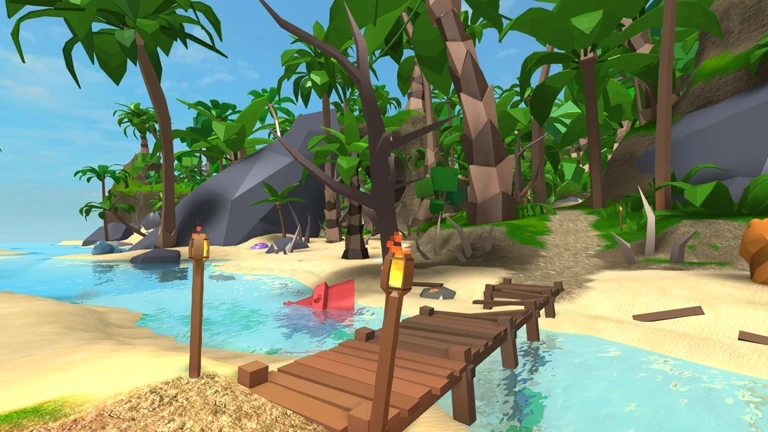
Welcome to Seaside Path! A location split into 3 different sections: lush grasslands, sandy beaches, and the shoreline.
Explore around and you may notice that this location connects to several familiar locations. Surprisingly it is not far from the starting location as it connects to Mushtown, Nilgarf, and Great Crossroads which you just arrived from. If during the Beginner Guide, you decided to grind here, you may be familiar with this location already.
Enemies[]
Hogs[]
You may recognize this enemy as you have encountered it several times in your adventures into The Clearing and Great Crossroads. These Hogs are no different than the ones in both locations.
Crabby[]
- Found walking along the sandy beach zones and shorelines
- Higher Damage compared to the Hog. A little more challenging to fight.
- Looks like a real crab, specifically modeled after the Atlantic Red Crab.
Baker’s Assistant[]
This optional quest is located in the grassy terrain where chickens reside. One NPC is located here, named Gertrude. Talking to the NPC allows you to initiate the Baker’s Assistant quest. You will need to kill Hogs repeatedly until you obtain 10 Hog Meat and 1 Bag of Sugar.
Baker’s Assistant Part 2[]
This quest follows the optional quest of Bake’s Assistant Part 1. Gertrude will offer the player a Hog Meat Pie and task them with traveling to Warrior Stronghold to deliver the pie to their son.
Fisherman[]
The Fisherman is located near a dock that stretches from the sandy beach area. The Fisherman will offer items in return for Crabby Claws.
After navigating through this large area, it is time to locate the Hunter faction base. Head down to the sandy beach area and from the coming out of Great Crossroads perspective, head right on the cobblestone path.
Scallop Shores[]
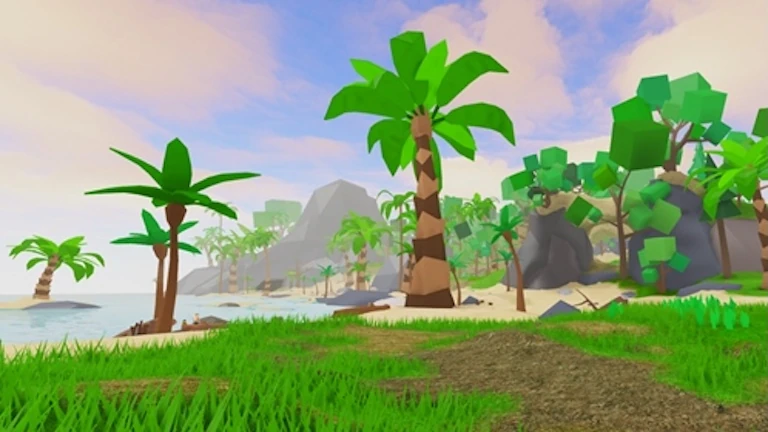
Welcome to Scallop Shores! This location is a beautiful tropical shoreline with lashings of palm trees, adventurous terrain, and a large range of wildlife and decoration. It continues the theme of its connecting location, Seaside Path.
Exploring around, you may be amazed by the scenery and the numerous amount of Palm Trees. In addition, several islands seem to be separate from the main island and may hide additional adventure.
Enemies[]
Crabby[]
You may recognize this enemy as you have encountered it several times in your adventures into Seaside Path. These Crabbies are no different than the ones in Seaside Path.
Rubee[]
- Found to the right of the main path in a grassy area. Yellow beehives will stick out of walls and hills will begin to form.
- Harder than a Crabby and its stinging attacks may hurt. Be careful as entering into their territory may cause a swarm of them to target you.
- Looks like a Bee or arguably, a Wasp, however, still functions like a Bee.
Once the path ascends to an elevated fortification, you have officially entered the Hunter Checkpoint. Seems like their faction base is near here somewhere. The path should fork into 2 paths. Take the left path and continue the trail until reaching the end.
Port Fidelio[]
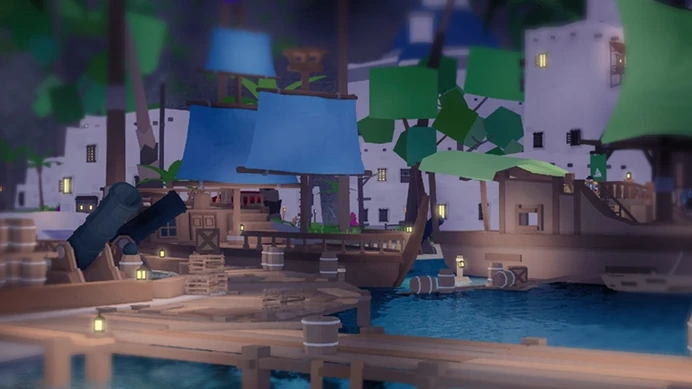
Wow! This is Port Fidelio! A faction base that’s home to the Hunters, but also where commerce thrives. This location starts out with a few tents and huts, but eventually leads to the heart of the city where ships are anchored to the docks, white towers rise high, and Vesterians populate the main center of the city.

Now that we have found the Hunter base, we must talk to the leader to join their faction. Explore around as you look for him.
Salty Dog Tavern[]
This Tavern seems to be popular and the bartender serves some exclusive food items that haven’t been seen sold elsewhere. If we look to the left, there’s a small staircase leading to the second floor. Even more NPCs are found here. Go behind the stairs to where a man is standing. This is Admiral Hugo, the leader of the Hunters! Talk to him to join the Hunters! You should’ve received some Hunter Runes, which fast travel to here, and a wooden dagger, your first hunter weapon! The shop on the second floor also offers additional Hunter gear available to be purchased.
Whale Tale[]
This is an optional quest that can be started at level 9. Return to the tent and huts area near the Scallop Shores portal. One NPC named Richard should help you initiate the quest upon talking to him. You must investigate any traces of his friend, Mobeus, who suddenly disappeared. Returning to the Salty Dog Tavern, you notice one of the NPCs who are ill-tempered may be able to help. But only if he gets his muffin. Purchase a muffin from the bartender and give it to him to learn about Mobeus’s whereabouts. Sadly, he doesn’t know much either but has referred you to someone upstairs. Talk to One-Eye Chuck who may give you some more information.
Whale Tale Part 2[]
One-Eye Chuck has told you that Mobeus’s disappearance may have something to do with the Evil Scientist. Find the Evil Scientist near the beach area and ask him where Mobeus is. What’s that? He won’t do so, and magically sends you away from him every time you ask? Guess it’s time to pickpocket him. Return to the Scientist and sneak behind him, allowing you to pickpocket his key. Once you gain access to the key, you must locate his Lair. If you find Taximan Dave, the Lair is located in a tower right above him. Using your parkour skills, try to get into that Lair. Once you enter the Lair, read the book for more information on Mobeus. Oh no! Mobeus has been turned into a Whale after wishing to the Evil Scientist to become a Whale Hunter! You must find Mobeus quickly. Head to Slaughterbay and Mobeus should be seen to the right. Talking to him should complete the quest. Mobeus will also give you a pocket watch that could be sold or returned to Richard in exchange for 40 Zebra Fish.
Hunter Skills[]
Double Jump[]
Double Jump is a passive ability that allows the player to jump once more whilst in midair. It is almost required that you unlock this ability as it will drastically enhance your mobility.
Barrage[]
Barrage is an active ability that can be upgraded 10 times. It requires a bow either equipped or in the offhand. Upon activating it, your bow automatically shoots 3 arrows at high velocity. This is only recommended for those who want to become a ![]() Ranger (Currently the ability is bugged and may break the hot bar. Thus, it may not be useful until it has been fixed).
Ranger (Currently the ability is bugged and may break the hot bar. Thus, it may not be useful until it has been fixed).
Execute[]
Execute is an active ability that can be upgraded 10 times. Upon activation, the user delivers a quick high-damaging stab. If it kills the enemy, the cooldown becomes refreshed. 3 points are required to be put in this ability in order to unlock the Shunpo ability. It is highly recommended, especially for ![]() Assassins.
Assassins.
Shunpo[]
Shunpo is an active ability that can be upgraded 10 times. Upon activation, the user dashes forward delivering damage while piercing through them. This is a highly recommended ability as it allows the user to deal damage without being damaged back if used correctly, especially for ![]() Assassins.
Assassins.
Note: Class Pathways end here. The rest of the guide applies to all players, regardless class.
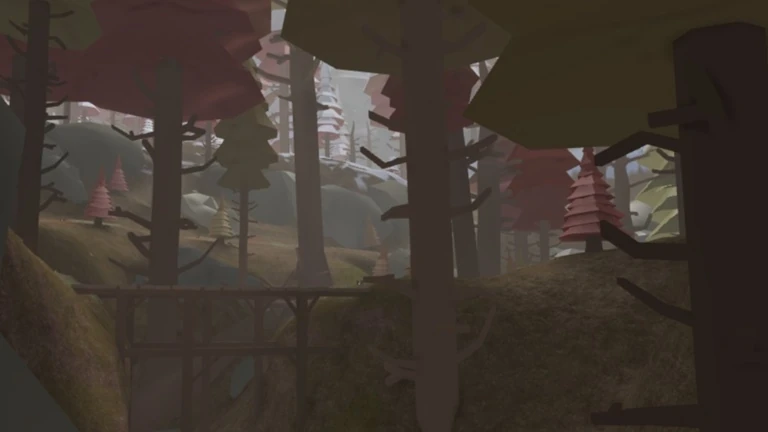
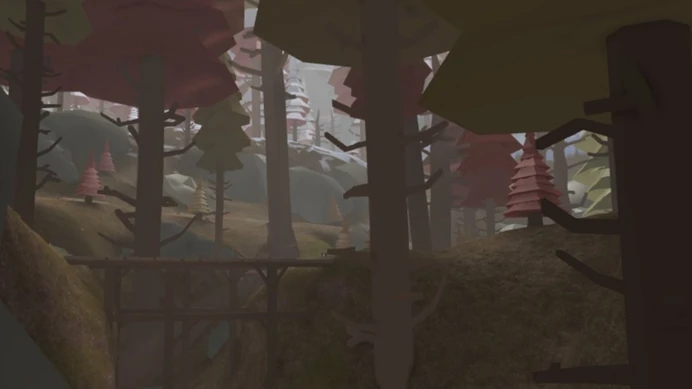
You have decided to become a ![]() Warrior! The mighty, tankier type of class. The path you seek lies straight forward in between the 2 other paths. If you have done everything correctly, the middle path should resemble an autumn-themed tree canopy with pinewood trees and twisted pathways. Continue on this path until you reach the end.
Warrior! The mighty, tankier type of class. The path you seek lies straight forward in between the 2 other paths. If you have done everything correctly, the middle path should resemble an autumn-themed tree canopy with pinewood trees and twisted pathways. Continue on this path until you reach the end.
Redwood Pass[]
Welcome to Redwood Pass! This location is an autumn-themed forest, coated in trees with red, orange, and light green leaves. Walk up a bit further, and players are met with a winter-themed mountainous terrain, with thick snow and ice surrounding pathways.
This area is known for its lengthy trails as the twists and turns add distance. However, shortcutting allows you to travel quicker, but you are met with more danger. Explore this area to find possible chests. After you finish exploration, stay on the main trail to avoid getting lost.
Enemies[]
Treemuk[]
- Found to the right within the woods of the redwood forests
- Mediocre level and damage, not as threatening compared to the Scarecrows
- Resembles a tree bark with twigs acting as the hands
- Has eyes similar to a Scarecrow or Guardian's cursed eyes.
Guardian[]
- Found within piles of rocks on the grounds. These can only be found in the bottom half of Redwood Pass.
- Very high level! May one-shot kill you with its boulder attack. Stay away from these!
- Resembles a bunch of rocks stuck together with glowing eyes.
- Upon death, it explodes as a last resort however if you survive that, you will get a Guardian Core
Baby Yeti[]
- Found roaming in the upper mountainous regions.
- Higher damage and level compared to Treemuk. Not as threatening as the Guardian.
- A very cute, white fluffy animal with small horns and charming eyes
 The Yeti[]
- Found in the Yeti Cave Sublocation. (See Redwood Pass)
- Extremely high damage! Capable of one shooting similar to the guardians.
- Usually lasts less than a minute due to multiple high-max level players fighting it.
Warrior Camp[]
The Warrior Camp is located halfway up the hike to the mountaintop. If you found this location, great job, however, the real faction base is not located here. A few quests are available here, however, they require you to be a higher level to initiate. Continue past the Warrior Camp and you may find that the weather begins to turn snowy.
Aviator's Cap[]
Before leaving Redwood Pass, climb the snowy mountains near the teleporter. At the top, you will reach Redwood Summit and a Golden Chest is located there. Opening the Golden Chest rewards you with an Aviator's Cap! This headgear gives +3 bonus stamina!
Once you reach the end of the Redwood Pass trail, you have found the warrior faction base! Walk in the teleporter.
Warrior Stronghold[]
Wow! This is Warrior Stronghold! A faction base for the proud, mighty warriors, but also the base of operations. This is a fortification that stretches over the peaks of the mountains, continuing the snowy theme of Redwood Pass. Below, you may notice frozen lakes and snowy forests.
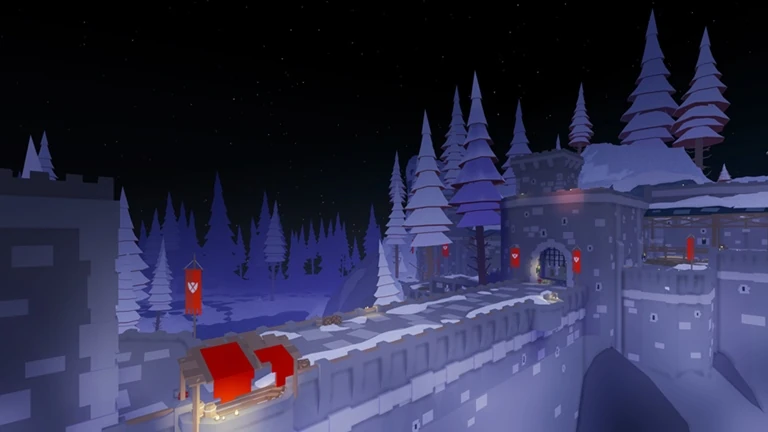
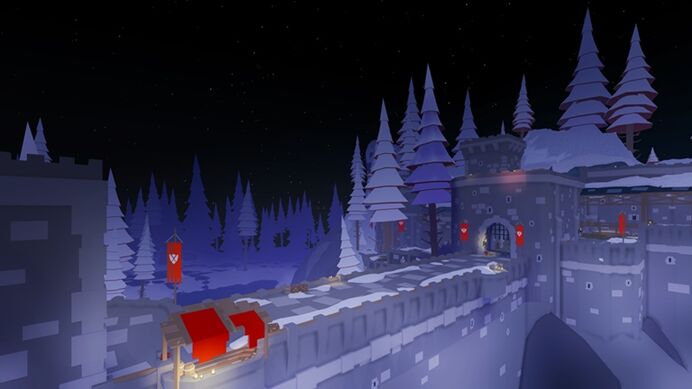
Continue through the trails and you will eventually enter the heart of the fortification. A guard will open the gate when you first approach, but later will remain open for future returning travels. Head through the gate and keep straight. Enter the building by interacting with the entrance.
Warrior Base[]
Now that you are in the hall of the Warrior Base. This place feels cold however inside the castle it is very warm. Walk straight forward until you meet Sir Tristain, who will let you pledge yourself to become a Warrior! Great! You should have a few Warrior Runes, which fast travel to here, and a Rusty Sword, your first Warrior weapon! Leaving the hall and then taking a left (from the perspective of leaving the building), you will see a Blacksmith that sells equipment for Warriors. To the left of the building (from the perspective of facing the entrance) lies another small entrance to a shop that sells a few potions and Warrior Runes.
Warrior Skills[]
Triple Slash[]
Triple Slash is a passive ability that can be upgraded 5 times. It is strongly recommended for Warriors to unlock.
Quick Slash[]
Spin Slash is an active ability that can be upgraded 10 times. Upon activation, the player makes 3 slashes with their weapon, damaging enemies in front of the player that are close enough.
Blasting Slash[]
Blasting Slash is an active ability that can be upgraded 10 times. Upon activation, the player makes a magical slash that shatters and blasts the ground. This ability deals magical damage!
Combat Roll[]
Combat Roll is an active ability that can be upgraded 5 times. Upon activation, the player does a front flip on the ground while taking reduced damage while performing the flip. This is also strongly recommended for traveling and dodging attacks.
Parry[]
Parry is an active ability that can be upgraded 5 times. Upon activation, the player enters a guarding stance. If struck by an attack, the player takes half damage and returns a high damaging attack. If struck by a projectile, it is reflected back. It is not that popular, however, it is worth unlocking as using this correctly may make it very useful in certain situations. Note that the returning damage does not depend on the amount of damage you take.
Ground Slam[]
Ground Slam is an active ability that can be upgraded 10 times. Upon activation, the player slams his/her sword on the ground causing a shockwave to damage enemies. This is the most recommended active ability to unlock as it becomes useful in many situations.
Note: Class Pathways end here. The rest of the guide applies to all players, regardless class.
You have decided to become a ![]() Mage! The magical, intelligent type of class, can hold it's own against single targets but has amazing crowd control. The path you seek lies to your right. If you have done everything correctly, the right path should resemble a magical fantasy-like forest with luminous plants and mysterious terrain. Continue on this path until you reach the end.
Mage! The magical, intelligent type of class, can hold it's own against single targets but has amazing crowd control. The path you seek lies to your right. If you have done everything correctly, the right path should resemble a magical fantasy-like forest with luminous plants and mysterious terrain. Continue on this path until you reach the end.
Enchanted Forest[]
Welcome to Enchanted Forest! This location is known for its wide variety of unique vegetation never seen before. The entire area is covered in thick trees, and a mixture of mushrooms, flowers, and other foliage span the ground. A variety of glowing plants and mist contribute to its magical atmosphere.
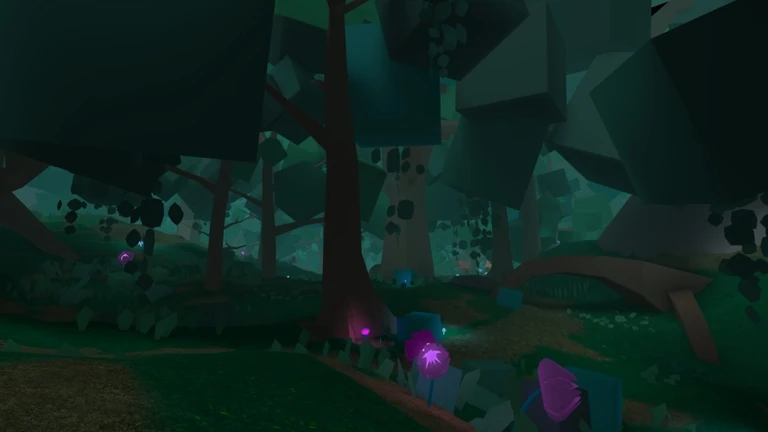

This area is very mysterious including the visibility being reduced by the fog. What lies inside this forest is up to you to figure out! Just watch out for pits as they contain the essence of an arachnophobe's nightmares!
Enemies[]
Goblin[]
- Found in Goblin villages located throughout the forest. The first village is located to the left of the spawn, while another is located to the left before entering the large pond's overhang trail.
- Mediocre level and damage, not as threatening compared to the Scarecrows.
- Tiny green mobs with pointy ears and wooden clubs. Begins to get blue eyes and glowing clubs when buffed by their Shaman.
Shaman[]
- Found anywhere near goblin spawn locations
- Mediocre level and damage, not as threatening compared to the Scarecrows.
- A dancing goblin holding a staff. Capable of buffing nearby Goblins.
- Slow attack speed limits its threat.
Spider[]
- Found in pits to the left of the gnome village. Also found in a smaller cave near the large goblin villages.
- High level and damage compared to Goblins. Royal Spider variants are even more deadly.
- A standard eight-legged spider
Spiderling[]
- Found in the depths of spider cave pits
- Super high damage compared to Spiders, but very weak in health.
- A smaller version of the Spider
- Avoid at all costs!
Business Trip[]
Remember that quest Albert Figgleglasses gave you? He wanted a few goblin ears that drop from Goblins which happens to spawn in this location! Continue grinding the goblins until you get enough drops. You can move between the small and large goblin villages. Afterward, Albert will meet you at Tree of Life but wait, that's also where you are going for joining the mage faction! Continue on the cobblestone road in Enchanted Forest to reach the mage faction base.
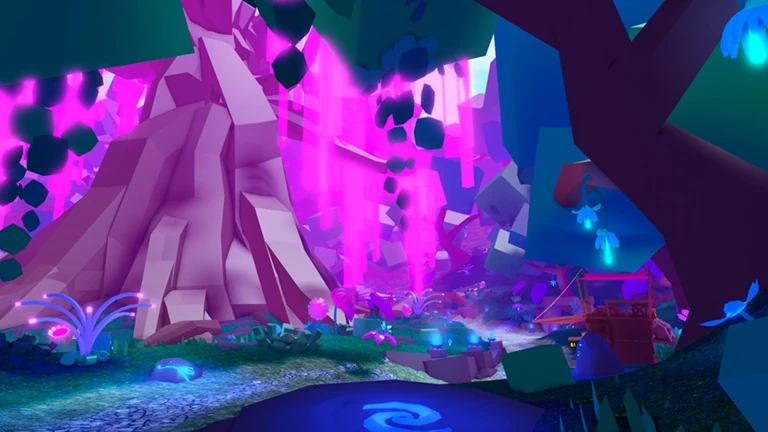
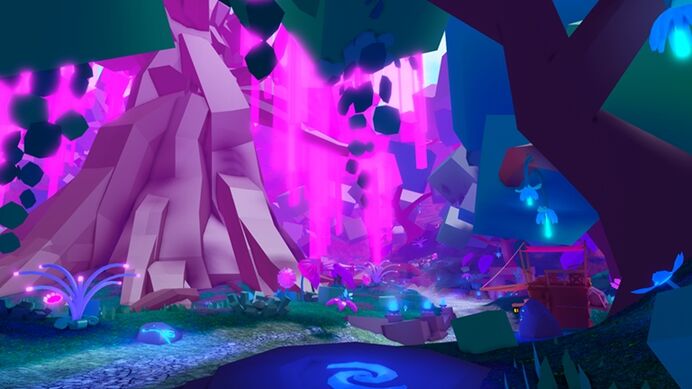
Tree of Life[]
Wow! This is Tree of Life! A faction base for the magically intelligent Mages, but also hideaway where the sacred tree brings life to its surrounding vegetation. This location continues the theme of peculiar, magical plants in the Enchanted Forest as the large, ancient tree provides the source of power needed to allow these plants to survive.
Explore around as you may discover many secrets in this area. One of them being the magical stones that let you warp around the tree! Continue walking about the tree until you find an entrance with Mage banners hung on the two sides of it. Walk through the entrance and up the stairs to an elevated area. Go through the middle of the building and you should see Greybeard the Old, the faction leader of the Mages! Talk to him to become a Mage. You should have a few Mage Runes, which fast travel to here, and a Training Staff, your first Mage weapon!
Business Trip Part 2[]
Oh, did we forget about our quest that we promised Albert? Warp around the tree until you find a few houses. Enter one of the houses and you should see Mr.Plant living inside his miniature home. Upon talking to him, you should complete the quest. He will also prompt you to talk to his neighbor, Mrs. Plant, for part 2 of the quest. Head next door as he requested and Mrs.Plant will tell you that she wants a magic flower. Return to Mr.Plant and he will ask you to help him find the magical flower that Mrs.Plant wishes. Search around the roots of the tree as the Magic Flower spawns randomly around it. After finding it and foraging it, return to Mrs. Plant and Mr. Plant to give the flower and complete the quest, respectively.
Mage Skills[]
Mana Bomb[]
Mana Bomb is an active ability that can be upgraded 10 times. Upon activation, the player casts a spherical projectile that explodes on impact or when traveling a certain distance. This is the most recommended ability for players to upgrade as it has high damaging capabilities. This ability can come in multiple variants, which will be later covered in the Advanced Guide.
Blink[]
Blink is an active ability that can be upgraded 5 times. Upon activation, the player teleports the direction they are facing while leaving a trail of particles behind. It is recommended that players unlock it as it’s the only traveling ability for Mages. It is also arguable that players don’t upgrade it past level 4 as the max level only increases the damage and mana cost.
Thundercall[]
Thundercall is an active ability that can be upgraded 10 times. Upon activation, the player casts their staff summoning bolts of lightning from the sky, striking with AoE damage at where the player's cursor is. This ability isn’t recommended to maxed out as it doesn’t come in handy in certain situations nor will it have high damaging capabilities.
Zap[]
Zap is an active ability that can be upgraded 10 times. Upon activation, the player releases bolts of lightning at a short-range distance.
Note: Class Pathways end here. The rest of the guide applies to all players, regardless class.
Professions[]
Professions are different types of activities that players can pursue in the game. Currently, there is 1 profession, which is known as Fishing. Note:Woodcutting and Mining have not been fully implemented into the game yet.
Fishing[]
Fishing is available to all players regardless their faction. Fishing can be performed with a Fishing Rod, where low-tier fishing rods can be purchased from a fishing shop in Port Fidelio (Hunter Faction Base, refer back above if you need help finding this location). Once you have a fishing rod, click on a water source to cast the rod into the water. Wait for the bobber to submerge and splash indicating that a fishing is ready to be reeled in. Click once again to reel the fish out of the water. The Old Fishing Rod can only obtain common fish that can be found in most bodies of water in the lands of Vesteria. High tier rods like Fishing Rod or Advanced Fishing Rod can be used to obtain higher tier fish. However, certain tier fish will only appear in certain themed locations (e.g. Crimson Fish can only be fished in tropical locations like Seaside Path, Scallop Shores, and Port Fidelio).
Continuing Intermediate Progression[]
Now that you have joined a faction, it is not only time to toy around with your new skills, but also time to locate and search for a grinding hotspot. If you happen to discover additional quests (that aren't covered in this guide), you are welcome to complete them. Here are a few locations we suggest for grinding to level 20.
Start by returning to the 3-path crossroad in the Great Crossroads. Head towards Seaside Path by taking the left path similar to the path Hunters would take. From Seaside Path, head to Scallop Shores. Once at Scallop Shores, walk along the sandy beaches zone. In the end, you may see a sunken ship on your left. Head underwater below the ship and continue moving forward. Eventually, you should discover the secrets that lie on the bottommost portion of the water.
Shiprock Bottom[]
Welcome to Shiprock Bottom! This location is known for its abundance of kelp and other aquatic plants. Sunken ships and other collected junk reside here as well. Most importantly, a secret located between the remains of a sunken ship unlocks a Golden Chest.

Adventure around the ocean depths and see what you may discover.
Enemies[]
The Snel Family[]
- Snels: Snelvin, Snelleth, Snel Snel, Snelly
- Found roaming around the sandy floors
- Very high damage and can drain health immediately. However, very slow in movement and exploitable small hit-range (You can safely farm these if you stand at a certain range making you capable of hitting them without being damaged).
- Looks like a typical snail in real life with 3 eyes.
Strange Stones[]
Exploring around, you may notice strange stones that read peculiar words. These words are actually important as they act as a code for accessing the secret grate entrance to the Golden Chest. We recommend you try to solve the Decoder puzzle as there are very rewarding chests below the grate. Below are all the Strange Stone locations for reference.
Strange Stone #1[]
Players must venture into the dangerous Snelly caves through crevices on the ocean floor. Successfully making it to the bottom reveals one of the strange stones.
Strange Stone #2[]
In one of the land formations with large holes, swim to the top of the structure and you’ll find the stone there.
Strange Stone #3[]
See Wooden Chest 2
Strange Stone #4[]
This Stone is in the weird land formations similar to #2. However, there is a huge shipwreck in front of it and has been rolled onto its side. Enter the top small hole in the land formation, then swim up until you come out of water. You will find the Stone there.
Make sure to record or memorize the words (type in chat, writing it down, or in your head) as the decoder near the grate entrance can ask the code in any order. Once you open the grate, you will receive the Pirate Hat from the Golden Chest. The Bluesteel chest will reward 1 ![]() ! That's a lot, however, we recommend that you save at least 100
! That's a lot, however, we recommend that you save at least 100 ![]() by the time you reach level 30 for purposes in the Advanced Guide.
by the time you reach level 30 for purposes in the Advanced Guide.
Do you have feelings of nostalgia for Great Crossroads? Well, now it is time to head back! A special task awaits you at the Mushroom Research Base in Great Crossroads. You can retrace your steps to find your way back here. This task can both be done with and without a party, however, it is recommended to make a party as it is extremely hard to solo. There are 4 different difficulties available: Easy (Lvl. 10-25), Normal (Lvl. 20-35), Hard (Lvl 30-45), Insane (Lvl. 40-55). Since it's likely that you are around level 10 at this point, you can only do Easy mode for now. This task will also require all party members to be within level range of the chosen difficulty. When the party leader is ready, they should talk to Geologist Bridget to start the dungeon.
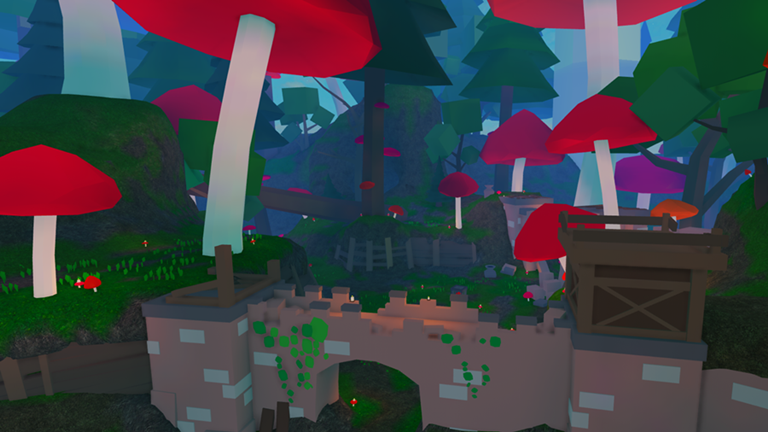
Mushtropolis[]
Welcome to Mushtropolis! Heart of the Mushroom Kingdom as stated by the game's description. This location is a special battleground in Vesteria as it is home to the Shroompocalypse Dungeon.
In this Dungeon, you must defend a cage from waves of Shrooms. Upon finishing the dungeon, a chest will drop providing all sorts of different rewards. You'll also receive Golden Mushrooms, which are a currency in the game used to purchase exclusive Mushroom-themed weapons. A shopkeeper at the Mushroom Research Base in Great Crossroads will sell various items as well as the exclusive, Mushroom Scroll, for Golden Mushrooms.
Since this is easy mode, you will only face 10 waves of enemies from the Shroom family. Beware, they are still quite strong!
Enemies[]
The following are enemies that can be found in easy mode in Mushtropolis. We'll cover Normal to Insane difficulties in a later guide.
Baby Shroom[]
You may recognize this enemy as you have encountered it several times in your adventures into the Mushroom Forest. These Baby Shrooms are a little higher level than the ones in the forest.
Shroom[]
You may recognize this enemy as you have encountered it several times in your adventures into Mushroom Forest. These Shrooms are a little higher level than the ones in the forest and does not damage the cage.
Elder Shroom[]
You may recognize this enemy as you have encountered it several times in your adventures into Mushroom Forest. These Elder Shrooms are a little higher level than the ones in the forest and does not damage the cage.
Poisoned Shroom[]
You may recognize this enemy as you have encountered it several times in your adventures into Mushroom Grotto. These Elder Shrooms are a little higher level than the ones in the grotto and does not damage the cage.
Tough Baby Shroom[]
- First seen on wave 3
- Higher damage and health compared to a normal baby shroom. May strike heavily on low-level players.
- A Baby Shroom with a yellower appearance.
Sage Shroom[]
- First seen on wave 9
- [placeholder]
- Looks exactly like an Elder Shroom
- Does not damage the cage
Eldest Shroom[]
- First seen on wave 10
- Acts as the "boss" of Easy difficulty
- Looks like an Elder Shroom with a longer beard and being much larger in size
Perks[]
If you bought one of the weapons, you may notice that there is an additional perk when you read the description. A Perk is an effect that gives the character a boost to gameplay. For the Mushroom Sword, the Perk Bounce back gives x3 knockback to Warrior abilities. For the Mushroom Dagger, the Perk Airborne gives x1.5 damage to attacks dealt in midair. For the Mushroom Staff, the Perk Spore Cloud leaves a poisonous cloud whenever you use Blink.
Perks can come from a variety of different sources: Class-Subclass Perks, Equipment Perks, Location Perks, and Stat Perks. For Stat Perks, adding points and reachign certain "milestones" will grant you a perk. You can view the Stats to view all the milestone perks.
To see a list of all active perks you currently have, open your skills menu (where you apply stat points and skill points), and a list can be found to the right of the stat GUI.
Scrolls[]
You may have received a few scrolls before becoming an Intermediate, however, we haven't covered some basics of scrolls. Scrolls are consumable items that enhance the stats of equipment. Headgear, attack, and defense scrolls improve the stats of their respective equipment. When you use a scroll, simply click on the scroll in the consumable section, then click on the equipment you wish to upgrade. Note: All equipment has an upgrade limit, which is stated in the description. Weapons and Armor tend to have 7 upgrade attempts while headgear has 3 upgrade attempts. If a scroll fails, the upgrade attempt is still used.
There are also different qualities of scrolls, which may affect how much it increases the stats of a weapon by (headgear scrolls tend to be rarer and higher quality headgear scrolls may not be implemented in the game yet):
- Basic Scroll: This scroll is the lowest quality scroll, however, it has a 100% success rate guaranteeing that it always works. When used, it increases weapon atk by 3 points.
- Great Scroll: This scroll is the second-lowest quality scroll following the Basic Scroll. It has a 70% success rate. If the scroll succeeds, it increases weapon atk by 6 points.
- Dark Scroll: This scroll is a moderate quality scroll following the Great Scroll. It has a 75% success rate, however if it fails, it has a 7.5% chance to destroy the weapon. If the scroll succeeds, it increases weapon atk by 9 points.
- Ancient Stat Scroll: This scroll is one of the highest quality scrolls following the Great Scroll. It has a 10% success rate making it not as popular as the other scrolls. If the scroll succeeds, it will increase the weapon ATK by 12 points, and the specific stat (STR, DEX, INT, or VIT) by 3 points.
- Ancient ATK Scroll: This scroll is one of the highest quality scrolls following the Great Scroll. It has a 15% success rate making it not as popular as the other scrolls. If the scroll succeeds, it will increase the weapon ATK by 15 points.
- Template Ancient Scroll: This scroll can turn into any ancient scroll of your choosing. The newly created ancient scroll has a +5% success rate.
- Spider Scroll: This scroll is one of the highest quality scrolls following the Great Scroll. It has an 85% success rate, but can only be applied to spider-themed equipment. However, this is very popular due to the phenomenal upgrades it can give when multiple are used on the same gear. If the scroll succeeds, it will increase the weapon ATK by 12 points, however, if this is the 3rd or 7th spider scroll to succeed on this gear, it will give additional bonuses (+5% Critical Chance for weapon scroll, +5% Block Chance for defense scroll, variable for headgear scroll).
- Mushroom Scroll: This scroll is one of the highest quality scrolls following the Great Scroll. It has an 85% success rate, but can only be applied to mushroom-themed equipment. However, this is very popular due to the phenomenal upgrades it can give when multiple are used on the same gear. If the scroll succeeds, it will increase the weapon ATK by 12 points, however, if this is the 3rd or 7th mushroom scroll to succeed on this gear, it will give additional bonuses (+3 to all stats for weapon and defense scroll, variable for headgear scroll).
- Ocean Scroll: This scroll is one of the highest quality scrolls following the Great Scroll. It starts at an 85% success rate, but slowly decreases for each successful ocean scroll on a particular item. It also can only be applied to ocean-themed equipment. However, this is very popular due to the phenomenal upgrades it can give when multiple are used on the same gear. If the scroll succeeds, the subsequent ocean scrolls on the same item will grant more points than the previous.
- Cursed Scroll: This scroll is one of the highest quality and used scroll in the game. It has a 60% success rate making it more popular than Ancient Scrolls, however, if it fails, it has a 20% chance to destroy the weapon. In other words, this is a "risk or reward" type of scroll. If it succeeds, the scroll will add anywhere from -6 to +24 weapon atk, and may add points to the 4 core stats, increase MP or HP, increase crit chance, or increase HP or MP restoration. The Shadow Cursed Scroll is a stronger version of the Cursed Scroll that guarantees at least +12 weapon atk, while all else being the same.
- Holy Scroll: This scroll differs from the other scrolls as it doesn't improve the stat of a weapon. Instead, it removes 1 failed upgrade attempt on a weapon. This is extremely popular among and sought by players because of this feature. The Magnificent Holy Scroll is a stronger version of the Holy Scroll that removes all failed upgrade attempts on a weapon.
- Reset Scroll: This scroll differs from the other scrolls as it doesn't improve the stat of a weapon. It removes ALL modifications done to a piece of equipment, including: variants, all failed and successful upgrades, dyes, names, and descriptions. This is popular among players who want to reset their weapon either because it has too many failed attempts or to remove low-quality scroll upgrades and make room for higher quality ones.
- Modifier Scroll: This scroll differs from other scrolls as it doesn't upgrade weapons. Instead, it applies an Equipment Attribute to the weapon, allowing that weapon to naturally have bonus stats that aren't from upgrading scrolls.
- Cosmetic Reset Scroll: This scroll differs from the other scrolls as it doesn't improve the stat of a weapon. Instead, it removes ALL cosmetic changes. Cosmetic changes include dyes, signatures, lores, and custom names.
Ever wonder what secrets lie in a great city like Nilgarf? Head back to Nilgarf using either a Nilgarf Rune or accessing it through the Great Crossroads or any other connecting locations. Once you arrive in Nilgarf, search around until you find the Garden sublocation. A fisherman should be seen fishing in a pond. Go under the pond and you may find something interesting!
Nilgarf Sewers[]
Welcome to Nilgarf Sewers! This location is a sewage system located beneath the streets of Nilgarf. It currently serves as a mid-level grinding area. The entire system is a street full of filth.

Go look around as you may find many secret chests here. It is common to get lost as the entire location consists of maze-like corridors, entrances/exits, and pit-falls/escape ladders.
Enemies[]
Ratty[]
- Found roaming everywhere within the Sewers.
- Very fast and sudden, and may inflict heavy damage. Best to stay away from these when underleveled.
- Looks like a typical rat with green fur, glowing yellow eyes, and sharp teeth.
- Drops: Ratty Tail (80%), Ratty Head (5%), Big Blue Potion (1%), Vitality Potion (0.4%), Willow Staff (0.05%), Ancient Scroll for Weapon Attack (0.08%), Ratty Vest (0.025%) and Green Dye (0.01%)
Batty[]
- Found flying in cages within the Sewers.
- Has a tiny hitbox. A swarm can easily overwhelm you though.
- Looks like a typical bat.
Assuming you are at least level 20, it is time to move on. If you are still interested in exploring Nilgarf, you can head back to Great Crossroads and the guard should allow you to pass again.
Finishing Intermediate Progression[]
Head to the mage faction base, otherwise, referred to as Tree of Life (refer to the Mage tabber in this guide for directions on how to get there). At the Tree of Life, it is recommended that you party up with others similar to how you did with the Shroompocalypse minigame. A dungeon will be available, but this time featuring a very hard boss, known as Spider Queen. There are 4 different difficulties, with certain level ranges that you must be within in order to attempt that difficulty. Most players will prepare themselves at the Spider Camp sublocation, where the party leader can talk to a NPC to initiate the dungeon. Assuming you are around the level 20-30 range, you can attempt the Easy difficulty! In this difficulty, you will not face the Spider Queen, but instead, will need to defeat the Spider Prince.
Spider Abyss[]
Welcome to Spider Abyss - the host of the Spider Queen's Revenge dungeon! For easy difficulty, this dungeon contains 6 rooms of mobs, parkour, or bosses making it a very challenging dungeon. However, regardless of whether you survive or not, you are guaranteed 1 Million XP at the end as long as someone is able to kill the Spider Prince. In higher difficulties, you gain more EXP for completing the dungeon. Unlike Shrooompocalypse, the dungeon is timed with a 20-minute time limit for the entire dungeon instead of a fixed amount of time per wave. If the timer reaches 0 minutes while you are fighting the Spider Prince or Spider Queen, be prepared to face a swarm of constantly spawning giant enemies!

If you manage to survive to the final room and get a few hits off the Spider Prince (in higher difficulties, you will face the Spider Queen), a dungeon chest will appear. Upon opening, you may notice you received a special item called Royal Spider Egg. These are referred to as "eggs" by many Vesteria players and can be used to purchase exclusive Spider-themed weapons. Like Shroompocalypse, spider-weapons cost 50-70 ![]() for a weapon of a certain class. Each spider-themed weapon also contains a perk making it very useful like the Mushroom-themed weapons. If you are lucky enough, you may have directly received a weapon from the chest (on higher difficulties, you have a chance to receive excellent scrolls).
for a weapon of a certain class. Each spider-themed weapon also contains a perk making it very useful like the Mushroom-themed weapons. If you are lucky enough, you may have directly received a weapon from the chest (on higher difficulties, you have a chance to receive excellent scrolls).
Enemies[]
Spider[]
You may recognize this enemy as you have encountered it several times in your adventures into the Enchanted Forest. These Spiders are a little higher level than the ones in the forest.
Spiderling[]
You may recognize this enemy as you have encountered it several times in your adventures into Enchanted Forest. These Spiderlings are a little higher level than the ones in the forest.
Spider Prince[]
- Appears as miniboss for all difficulties.
- Located in Room #7
- Average damage of a Giant Spider with occasional high damaging venom bombs. Regens a massive amount of health when damaged unless the Shield Generators that protect it get destroyed.
- Looks like a giant Spider.
- Is basically a spider version of the Ender Dragon in Minecraft.
Spider Queen[]
- Final boss in all difficulties
- Located in Room #9.
- Extremely high damage for low-level players. Best to stay away whenever she is actively attacking. It is advised to use range attacks, however, you may safely damage her when she enters her deactivated state.
- Way larger than Spider Prince and has a crown on her head.
Rooms[]
Room 1[]
In the first room, the objective is simple. You must clear all Spiders in this room to progress to the next room.
Room 2[]
In the second room, the objective here is not to kill all enemies. Instead, you must rebuild the bridge by searching around the tunnels and passages for 4 gears. Once all 4 gears are found, all of them must be placed into the lever for the bridge to build. Beware, a Super Giant Spiderling spawns near 1 of the gears.
Room 3[]
In the third room, we have the same objective of killing all the enemies. Beware, a Giant Spider awaits in one of the encarved spaces of the cave system.
Room 4[]
In the fourth room, your goal is to parkour across to the other side. This may be nerve-wrecking as below the parkour course lies a Spiderling-infested pit. It's optional whether you want to clear the room or not. Beware that 4 Giant Spiderlings are scattered around in this room, 1 near the end, and 3 in the pit.
Room 5[]
In the fifth room, the objective is to destroy all spider egg piles. Beware that the egg piles continuously spawn spiderlings at a fixed amount of seconds. This room can also be treated as a grinding spot due to the infinite spawning of Spiderlings.
Room 6[]
In the sixth room, we have the same objective of killing all the enemies. Beware, a Giant Spiderling awaits at the bottom of the Spiderling-infested pit.
Room 7[]
In the seventh room, the objective is similar to Room 4, except failing the parkour will drop you down into a wide room containing enemies of the Spider family. Beware that lots of Super Giant Spiderlings spawn in this room, 1 near the end, and several in the pit, and 1 in the escape tunnel. If you accidentally fell down, you can either use the Spider web's elastic trampolines or an escape tunnel leading you to the top.
Room 8[]
In eighth room, the objective is to kill the Spider Prince. Notice, however, that its health instantly regenerates to max. Looks like you must defeat the Shield Generators that protect it, before moving on to kill the prince himself.
Room 9[]
If you managed to get through all the above 8 rooms, the last room contains the final challenge of this dungeon. A short cutscene will give you a glimpse of a large Spider asleep, however, your presence disturbs it and causes it to wake. This is not just any old Spider, as it is the ![]() Spider Queen! Once you defeat her, your team has successfully completed the dungeon.
Spider Queen! Once you defeat her, your team has successfully completed the dungeon.
Continue grinding here until level 30. You are also welcome to return to the aforementioned XP hotspots, however, this dungeon is the quickest way to level up. Note: Currently the dungeon completion EXP is bugged, however, you can still get lots of EXP from killing the mobs inside the dungeon, especially the Spiderlings in Room #2, Room #4, and Room #5 (leave the Spider Egg Piles alive for Spiderling farming).
This guide ends at level 30. For the next level guide, see this page.